

Ads
Achieving a perfect foundation match is crucial for a natural look, requiring an understanding of skin tone and undertone to secure flawless coverage effortlessly.
Finding the perfect foundation can feel like searching for a needle in a haystack, especially when aiming for that elusive, natural finish. This comprehensive guide, The Ultimate Guide to Choosing the Right Foundation for Your Skin Tone: Achieve Flawless Coverage in 3 Steps, demystifies the process, helping you select a foundation that not only matches your skin tone but also enhances your natural beauty with impeccable coverage.
Understanding Your Skin Tone and Undertone
Before you even think about shades, it’s essential to grasp the difference between skin tone and undertone. Many people confuse these two, leading to foundation mismatches that can leave skin looking ashy, orange, or simply unnatural. Getting this right is the foundational step to achieving truly flawless coverage.
Your skin tone refers to the surface color of your skin, which can change based on sun exposure or other environmental factors. It’s what you typically describe as fair, light, medium, tan, or deep. This is the most visible aspect, but it’s only half the story when it comes to foundation selection.
Identifying Your Surface Skin Tone
While seemingly straightforward, accurately identifying your surface skin tone requires a little observation. It’s best to do this in natural light, as artificial lighting can distort colors. Look at your bare face, neck, and chest to get a holistic view.
- Fair: Very pale skin, often burns easily.
- Light: Pale skin, but with a bit more color than fair.
- Medium: A moderate skin tone, not too light and not too dark.
- Tan: Golden or olive tones, tans easily.
- Deep: Darker skin tones, rich in melanin.
Remember that your skin tone can fluctuate throughout the year. You might be a shade or two darker in the summer and lighter in the winter. This is why having multiple foundation shades or a custom blending solution can be beneficial.
Unlocking Your Skin’s Undertone
Undertone, on the other hand, is the color that comes through from underneath your skin’s surface. Unlike your skin tone, your undertone remains constant, regardless of how much sun you get. It’s the secret ingredient to a truly seamless foundation match.
- Cool: Skin has hints of pink, red, or blue.
- Warm: Skin has hints of yellow, gold, or peach.
- Neutral: Skin has a balance of both cool and warm tones, or no obvious dominant undertone.
There are a few reliable ways to determine your undertone. One popular method is the ‘vein test.’ Look at the veins on the inside of your wrist in natural light. If they appear blue or purple, you likely have cool undertones. If they look green, you probably have warm undertones. If you can’t tell if they’re more blue or green, or they seem to be a mix, you likely have a neutral undertone. Another method involves the ‘jewelry test.’ Do silver or gold jewelry flatter your skin more? Silver often complements cool undertones, while gold tends to enhance warm undertones. If both look good, you might be neutral. Understanding these nuances sets the stage for selecting a foundation that truly becomes one with your skin.
Once you’ve accurately identified both your surface skin tone and your underlying undertone, you’re well on your way to narrowing down the vast array of foundation options. This initial assessment prevents many common foundation mistakes and ensures a more natural and flattering result. It’s a fundamental step that no one should skip if they’re serious about achieving a professional-looking finish.
Step 1: Selecting the Right Foundation Shade
With a clear understanding of your skin tone and undertone, you’re now equipped to tackle the most critical step: finding the perfect shade. This isn’t just about picking the color that looks closest in the bottle; it involves careful testing and observation to ensure a true match that disappears into your skin.
Many brands now categorize their foundations by undertone, making the selection process much easier. Look for labels that indicate ‘cool,’ ‘warm,’ or ‘neutral,’ or use letter codes such as ‘C’ for cool, ‘W’ for warm, and ‘N’ for neutral. This significantly reduces the number of shades you need to consider, allowing you to focus on the intensity of the color.
The Importance of Swatching Correctly
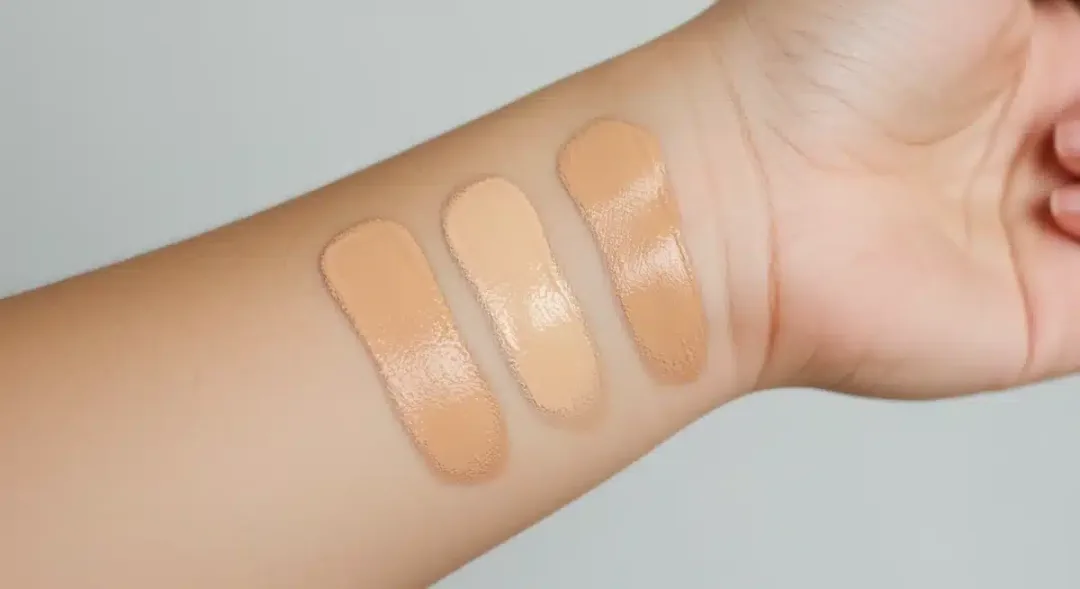
Never swatch foundation on your hand or arm, as these areas often have a different skin tone than your face. The most accurate place to test foundation is along your jawline, extending slightly down onto your neck. This allows you to see how the shade blends with both your face and your neck, preventing the dreaded ‘foundation mask’ effect.
- Apply three shades: Choose three shades that you believe are close matches. One that looks like your best guess, one slightly lighter, and one slightly darker.
- Blend lightly: Apply small stripes of each foundation side-by-side on your jawline and blend them out slightly with your finger or a clean brush.
- Observe in natural light: Step outside or near a window to observe the swatches in natural daylight. The shade that disappears into your skin, without leaving a noticeable line or cast, is your perfect match.
- Check for oxidation: Some foundations can oxidize, meaning they darken slightly after being exposed to air and your skin’s oils. If possible, wear the chosen shade for a few hours to see if it changes color before committing to a purchase.
This meticulous swatching process might seem time-consuming, but it’s invaluable for ensuring you walk away with a foundation that truly complements your complexion. A shade that is too light can make you look ghostly, while one that is too dark or too orange will look artificial. The goal is for your foundation to be virtually undetectable.

Considering Seasonal Changes
As mentioned earlier, your skin tone can change with the seasons. It’s common to need a slightly darker shade in the summer months when you might get more sun exposure. Conversely, you might need a lighter shade in the winter. Instead of buying two full-sized foundations, consider these options:
- Foundation mixers: Many brands offer white or dark foundation mixers that allow you to adjust your current foundation shade.
- Two shades: Purchase two shades, one for your lighter skin tone and one for your tanned skin tone, and mix them as needed to create a custom shade.
- Tinted moisturizer: Opt for a tinted moisturizer or BB cream during summer for lighter coverage and a more forgiving shade match.
By carefully selecting your foundation shade based on your undertone and performing thorough swatches, you’re laying the groundwork for a truly flawless complexion. This step is where many people go wrong, so taking your time here will pay dividends in the overall success of your makeup look. It’s not just about covering imperfections, but about creating an even, harmonious base that looks like your skin, only better.
Step 2: Choosing the Right Foundation Formula and Finish
Beyond shade, the formula and finish of your foundation play a crucial role in how it looks and feels on your skin. Different formulas cater to different skin types and desired outcomes, from radiant glow to matte perfection. Selecting the appropriate one is key to achieving lasting, comfortable, and truly flawless coverage.
The beauty market offers an overwhelming array of foundation types: liquid, cream, powder, stick, serum-infused, and more. Each has its own benefits and ideal applications. Your skin type—oily, dry, combination, or sensitive—should be the primary determinant in this choice, followed by the kind of finish you prefer.
Matching Formula to Skin Type
Understanding your skin’s needs is paramount. A foundation that works wonders for oily skin might cling to dry patches on someone with dry skin, while a dewy formula might leave oily skin looking greasy. Here’s a breakdown:
- Oily Skin: Look for oil-free, matte, or semi-matte formulas. Powder foundations or liquid foundations with a mattifying effect are excellent choices. They help control shine and can extend wear time.
- Dry Skin: Hydrating liquid or cream foundations, often labeled ‘dewy’ or ‘luminous,’ are ideal. Avoid powder foundations, which can emphasize dryness. Formulas with hyaluronic acid or nourishing oils are a bonus.
- Combination Skin: This skin type can be tricky. You might benefit from a satin-finish liquid foundation that offers a balance. Alternatively, you could use different formulas for different areas of your face (e.g., matte on the T-zone, hydrating elsewhere).
- Sensitive Skin: Opt for mineral-based, fragrance-free, and non-comedogenic (won’t clog pores) formulas. Look for foundations specifically designed for sensitive skin to minimize irritation.
The right formula will not only look better but also feel more comfortable throughout the day. It will work with your skin, rather than against it, ensuring your flawless coverage remains intact.
Understanding Foundation Finishes
The finish dictates the overall look of your skin once the foundation is applied. This is a matter of personal preference and desired aesthetic, but it also impacts how natural or glam your look appears.
- Matte: Provides a shine-free, velvety look. Great for oily skin or for those who prefer a more polished, long-lasting finish.
- Satin/Natural: Offers a soft, subtle glow that mimics healthy skin. It’s a versatile finish that works well for most skin types and is often considered the most universal.
- Dewy/Luminous: Gives a radiant, glowing, and hydrated appearance. Best for dry or mature skin, as it can make skin look more youthful and plump.
- Sheer/Tinted: Provides minimal coverage, allowing your natural skin to show through. Ideal for those who want to even out skin tone without a heavy feel.
Consider the occasion and the effect you want to achieve. A dewy finish might be perfect for a daytime casual look, while a matte finish could be preferred for a long-wearing evening event. The choice of finish directly influences the perception of flawless coverage; it’s not just about hiding imperfections but about creating a desired effect.
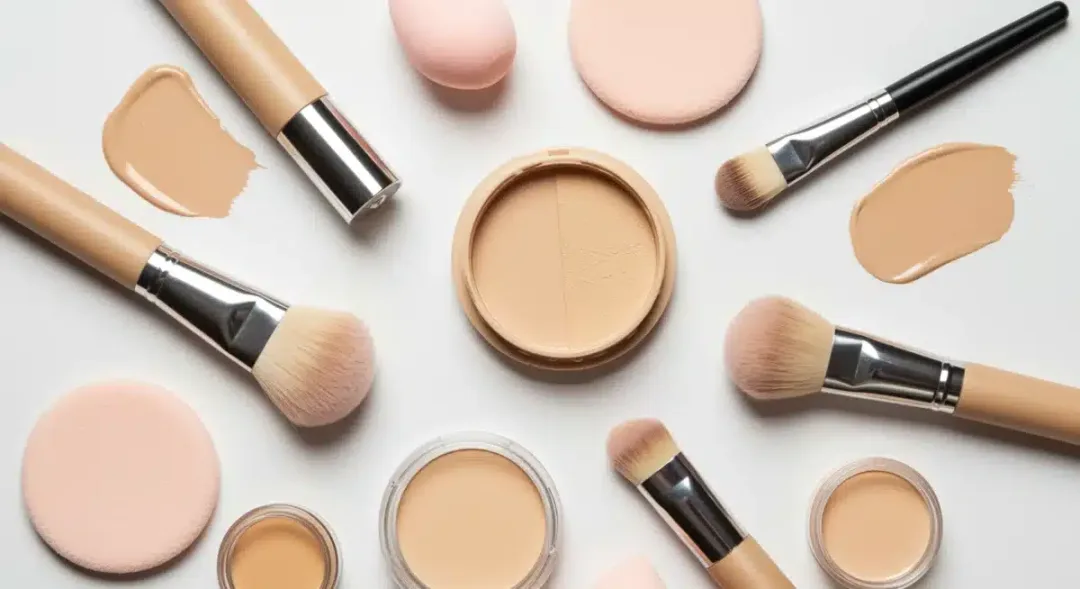
By carefully considering both your skin type and your desired finish, you can select a foundation formula that not only matches your skin tone perfectly but also enhances your complexion in the most flattering way possible. This thoughtful approach ensures that your flawless foundation coverage lasts and looks beautiful, complementing your natural skin rather than masking it. It’s an investment in your overall makeup aesthetic.
Step 3: Mastering Foundation Application Techniques
Even the most perfectly matched foundation can look less than flawless if applied incorrectly. The technique you use, along with the right tools, is paramount to achieving a smooth, even, and natural-looking finish. This final step brings together all your careful selections into a truly impeccable result.
There isn’t a single ‘best’ way to apply foundation; it often comes down to personal preference, the foundation’s formula, and the desired level of coverage. However, understanding the different methods and their benefits will help you choose the technique that works best for you and your chosen product.
Preparing Your Canvas: Skin Prep is Key
Before you even touch your foundation, proper skin preparation is essential. A well-prepped canvas ensures smoother application, better blending, and longer wear. Neglecting this step can lead to patchy foundation, emphasize dry areas, or cause makeup to break down quickly.
- Cleanse: Start with a clean face to remove any dirt, oil, or old makeup.
- Moisturize: Apply a moisturizer suitable for your skin type. Allow it to fully absorb for a few minutes before moving on. Hydrated skin makes foundation glide on effortlessly.
- Prime: A primer creates a smooth base, helps your foundation last longer, and can address specific concerns like oiliness, redness, or large pores. Choose a primer that complements your foundation formula (e.g., water-based primer with water-based foundation).
This preparatory routine can significantly impact the final look of your foundation, making the difference between a good application and a truly flawless one. It’s an often-overlooked step that can elevate your entire makeup game.
Choosing Your Application Tool
The tool you use can dramatically change the finish and coverage of your foundation. Experiment to find what works best for you and your chosen formula.
- Foundation Brushes:
- Flat-top Kabuki brush: Provides medium to full coverage with a buffed, airbrushed finish.
- Flat foundation brush: Offers a more precise application, good for building coverage, but can sometimes leave brush strokes if not blended well.
- Beauty Blenders/Sponges:
- When damp, these provide a more natural, sheer-to-medium coverage. They press the product into the skin, creating a seamless, skin-like finish. Excellent for blending.
- Fingers:
- The warmth of your fingers can help melt liquid and cream foundations into the skin for a very natural, sheer-to-medium coverage. Best for light coverage or tinted moisturizers.
Regardless of the tool, remember to use clean tools to avoid bacteria buildup and ensure smooth application. Regular cleaning of brushes and sponges is non-negotiable for hygiene and performance.
Techniques for Flawless Application
Once your skin is prepped and you have your chosen tool, it’s time to apply. The key is to start with a small amount and build coverage where needed, rather than applying a thick layer all at once.
Begin by dotting foundation onto the center of your face (forehead, nose, chin, and cheeks) where coverage is typically needed most. Using your chosen tool, blend outwards towards the perimeter of your face, including your jawline and neck. This technique ensures a natural transition and prevents a heavy, mask-like appearance. For areas requiring more coverage, such as blemishes or redness, lightly dab and press an additional small amount of foundation rather than rubbing. This builds coverage without disturbing the base layer.
Always blend well around the hairline, ears, and jawline to avoid harsh lines. A final light patting motion with a damp beauty blender can help meld everything together for an even more seamless look. Setting your foundation with a translucent powder, especially in oily areas, can help prolong wear and control shine without adding extra coverage. Mastering these techniques will ensure your foundation looks like a second skin, providing that coveted flawless coverage.
Common Foundation Mistakes and How to Avoid Them
Even with the best intentions, foundation application can go awry. Recognizing and correcting common mistakes is vital for anyone striving for truly flawless coverage. These pitfalls often undermine the effort put into selecting the perfect shade and formula, leading to a less-than-ideal finish.
Understanding these common errors allows you to troubleshoot your routine and refine your technique. From improper shade matching to neglecting skin prep, many issues can be easily remedied with a bit of awareness and adjustment.
Ignoring Skin Preparation
As highlighted earlier, skipping skin prep is a cardinal sin in foundation application. Applying foundation to dry, flaky, or unmoisturized skin will result in a patchy, uneven finish that emphasizes imperfections rather than concealing them. Similarly, not allowing moisturizer or primer to fully absorb can cause foundation to pill or slide off.
- Solution: Always cleanse, moisturize, and prime your skin. Give each product a moment to sink in before applying the next. This creates a smooth, hydrated canvas that foundation can adhere to seamlessly.
Incorrect Shade or Undertone Match
This is arguably the most common and noticeable mistake. A foundation that’s too light, too dark, or has the wrong undertone will make your face look disconnected from your neck and chest, or give your skin an unnatural cast (e.g., orange, pink, or ashy).
- Solution: Always swatch foundation on your jawline in natural light. Test at least three shades and wear the best match for a few hours to check for oxidation before purchasing. Re-evaluate your shade seasonally.
Applying Too Much Product
A heavy hand with foundation is a common mistake that leads to a cakey, unnatural look. The goal of foundation is to even out your skin tone, not to completely mask it. Layering too much product can settle into fine lines and pores, making them more noticeable.
- Solution: Start with a small amount of foundation and apply it strategically to areas that need coverage. Build up in thin layers only where necessary. Remember, less is often more when it comes to foundation for flawless coverage.
By being mindful of these common missteps, you can significantly improve your foundation application and achieve a more natural, polished, and truly flawless finish. It’s about refining your approach and understanding how each step contributes to the overall success of your makeup look.
Adapting Foundation for Different Coverage Needs
The beauty of foundation lies in its versatility. While the primary goal is often flawless coverage, what ‘flawless’ means can vary depending on the occasion or your personal preference. Adapting your foundation application for different coverage needs allows you to maximize your product and achieve a range of looks, from a sheer, natural glow to a full, perfected finish.
Understanding how to manipulate your foundation’s coverage—whether by technique, tool, or product combination—is an advanced skill that elevates your makeup artistry. It’s about being responsive to your daily needs and desired aesthetic without having to invest in multiple foundations for every scenario.
Achieving Sheer to Light Coverage
For days when you want your natural skin to shine through, but still desire some evening out, sheer or light coverage is ideal. This look is perfect for casual outings, a ‘no-makeup’ makeup look, or when your skin is already in good condition and just needs a little boost.
- Mixing with moisturizer: Blend a small amount of your liquid foundation with your daily moisturizer or a facial oil. This dilutes the pigment, creating a tinted moisturizer effect.
- Damp sponge application: Apply a small amount of liquid foundation with a thoroughly damp beauty blender or sponge. The water in the sponge will help sheer out the product, providing a lighter veil of coverage.
- Minimal product, targeted application: Use only a tiny amount of foundation and apply it specifically to areas that need it most (e.g., around the nose, under the eyes) and blend outwards.
This approach highlights your natural skin while providing just enough coverage to look polished and fresh. It’s about enhancing, not concealing, for a truly effortless flawless coverage.
Building Medium to Full Coverage
When you need to conceal more significant imperfections, redness, or uneven skin tone, medium to full coverage foundation techniques come into play. This is often preferred for events, photography, or when you simply desire a more perfected complexion.
- Layering: Start with a thin layer of foundation applied with a brush or sponge. Allow it to set for a minute, then apply a second thin layer only to areas that require additional coverage. This builds coverage without looking heavy or cakey.
- Dense brush application: Use a dense, flat-top kabuki brush to buff liquid or cream foundation into the skin. This tool packs on more product and provides a higher level of coverage than a sponge.
- Spot concealing: For stubborn blemishes or dark spots, apply a small dot of foundation (or a matching concealer) directly onto the imperfection with a precise brush and gently tap to blend the edges.
The key to building coverage without looking heavy is to use thin layers and blend meticulously. This ensures that even full coverage looks smooth and natural, maintaining the illusion of flawless coverage rather than a mask. Adapting your application to your coverage needs allows for greater flexibility and ensures your foundation always looks its best.
Maintaining Your Flawless Coverage All Day
Achieving flawless coverage is one thing; making it last all day is another challenge entirely. Factors like humidity, oil production, and even accidental touches can compromise your perfect base. Fortunately, with the right techniques and products, you can significantly extend the wear of your foundation, ensuring your complexion remains impeccable from morning to night.
The longevity of your foundation hinges on a combination of proper preparation, application, and strategic setting. It’s a multi-step process, but each step plays a crucial role in locking in your flawless coverage.
Setting Your Foundation
Once your foundation is applied, setting it is essential to prevent it from moving, creasing, or fading. Different setting products offer various benefits for different skin types and desired finishes.
- Setting Powder:
- Translucent powder: Ideal for all skin types, it sets foundation without adding color or coverage. Apply lightly with a fluffy brush, focusing on areas prone to shine (T-zone).
- Tinted powder: Adds a touch more coverage and helps to even out skin tone further. Choose a shade that matches your foundation.
- Baking: A technique where a generous amount of translucent powder is applied to specific areas (like under the eyes or T-zone), allowed to sit for a few minutes, then brushed away. Provides a very matte, long-lasting finish.
- Setting Spray:
- A fine mist applied after all makeup is done. It helps melt powders into the skin for a more natural finish and creates a protective barrier that extends wear. Look for formulas catering to oily skin (mattifying) or dry skin (hydrating/dewy).
Using both a setting powder and a setting spray can create a powerful duo for ultimate longevity, especially for important events or long days. This dual approach ensures your flawless coverage stays put.
Touch-Up Strategies for Longevity
Even with the best setting techniques, touch-ups might be necessary, especially for those with oily skin or during hot weather. The key is to touch up strategically without disturbing your existing makeup.
- Blotting papers: These are your best friend for combating shine without adding more product. Gently press blotting paper onto oily areas to absorb excess oil, then lightly re-powder if needed.
- Powder compacts: A pressed powder compact is convenient for on-the-go touch-ups. Use a small puff or brush to lightly dab powder onto shiny areas. Avoid sweeping motions, which can move your foundation.
- Mini setting spray: A travel-sized setting spray can refresh your makeup and re-hydrate your skin, making your foundation look freshly applied.
By incorporating these setting and touch-up strategies, you can ensure your flawless coverage remains vibrant and fresh throughout the day, giving you confidence in your complexion from morning coffee to evening plans. It’s about being prepared and proactive in maintaining your perfect base.
| Key Step | Brief Description |
|---|---|
| Identify Skin Tone & Undertone | Crucial for selecting the correct foundation shade that harmonizes with your natural complexion. |
| Choose Formula & Finish | Match foundation type (liquid, powder, cream) and desired finish (matte, dewy) to your skin type. |
| Master Application Techniques | Proper skin prep, tool selection, and blending ensure a smooth, natural, and long-lasting finish. |
| Maintain Coverage | Set foundation with powder and spray, and use blotting papers for touch-ups to ensure all-day wear. |
Frequently Asked Questions About Flawless Foundation
How do I know if my foundation shade is correct?▼The best way to verify your foundation shade is correct is by swatching it along your jawline and observing it in natural light. The perfect shade will seamlessly disappear into your skin, leaving no visible line or distinction between your face and neck. It should enhance, not mask, your natural complexion.
Can I use the same foundation all year round?▼It’s generally recommended to adjust your foundation shade seasonally. Your skin tone often gets slightly darker in the summer due to sun exposure and lighter in the winter. Having two shades or using foundation mixers can help you achieve a perfect match year-round, ensuring consistent flawless coverage.
What’s the best tool for applying foundation for flawless coverage?▼The ‘best’ tool depends on your desired finish and the foundation formula. Damp beauty blenders offer a natural, sheer-to-medium finish, while dense brushes provide fuller coverage and an airbrushed look. Fingers work well for light coverage. Experiment to find what provides your preferred flawless coverage.
How can I prevent my foundation from looking cakey?▼To prevent a cakey appearance, always start with well-prepped and moisturized skin. Apply foundation in thin layers, building coverage only where needed. Use a damp sponge to press the product into the skin, and avoid over-applying. Less product often leads to a more natural, flawless coverage.
Should I use primer before foundation?▼Yes, using a primer before foundation is highly recommended. Primer creates a smooth base, helps foundation adhere better, minimizes pores, and extends wear time. It can address specific concerns like oiliness or dryness, contributing significantly to achieving and maintaining flawless coverage throughout the day.
Conclusion
Mastering the art of foundation application, especially when aiming for truly flawless foundation coverage, is a journey of understanding your unique skin and refining your techniques. By diligently following these three essential steps—accurately identifying your skin tone and undertone, selecting the ideal formula and finish, and mastering precise application—you empower yourself to achieve a complexion that looks naturally radiant and impeccably even. Remember that practice makes perfect, and adapting these guidelines to your individual needs will ultimately unlock your best foundation look, leaving you with confidence and a beautifully perfected canvas every time you step out.