
Ads
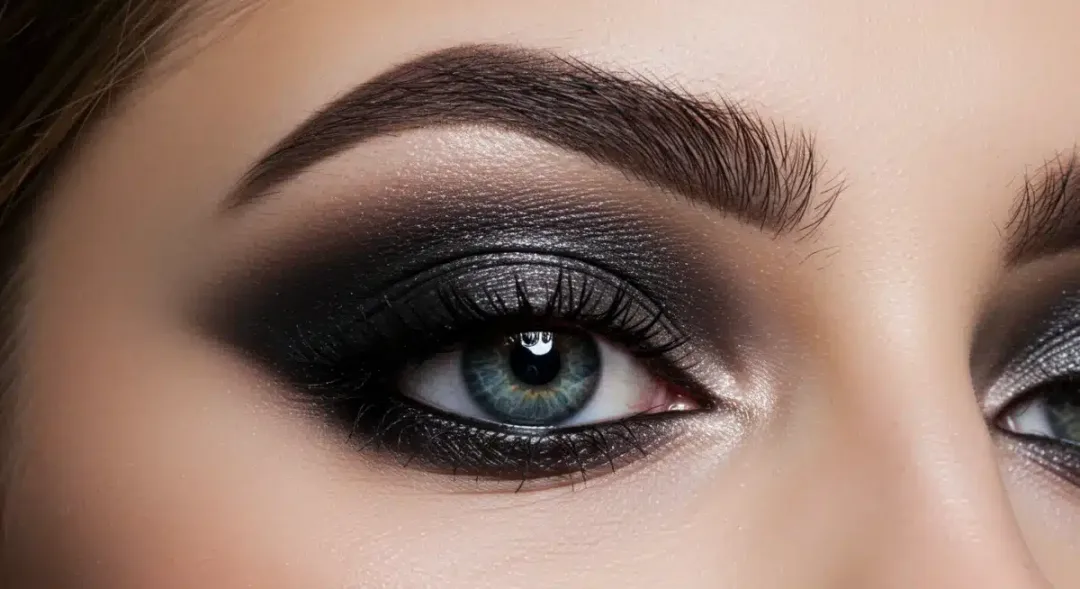
Mastering the smoky eye involves a precise layering of dark eyeshadows, expert blending techniques, and the right tools to create a sophisticated, dramatic, and universally flattering makeup statement.
Are you ready to elevate your makeup game and achieve that coveted, alluring gaze? Learning how to create a flawless smoky eye tutorial can transform your look, adding depth and drama perfect for any evening event or whenever you want to make a statement. This classic technique, often seen on runways and red carpets, is surprisingly accessible with the right guidance and practice.
Understanding the Anatomy of a Smoky Eye
Before diving into the application, it’s crucial to understand what makes a smoky eye so iconic. It’s not just about dark colors; it’s about seamless transitions, depth, and intensity that draw attention to the eyes. This look typically involves a gradient of shades, moving from darkest at the lash line to lighter tones towards the brow bone, creating a soft, diffused effect.
The foundation of a great smoky eye lies in selecting the right color palette. While black and gray are traditional choices, a smoky eye can be achieved with various colors like deep browns, purples, blues, or even greens. The key is to choose shades within the same color family that complement each other and your skin tone.
Choosing Your Color Palette
The beauty of the smoky eye is its versatility. While the classic black and gray remains a timeless favorite, don’t be afraid to experiment with other hues that can enhance your natural eye color or match your outfit.
- Classic Black/Gray: Ideal for a dramatic, evening look, universally flattering.
- Warm Browns/Bronzes: Softer, more natural, perfect for daytime or a subtle smoky effect.
- Deep Purples/Burgundies: Enhances green and hazel eyes, adding a touch of sophistication.
- Navy/Forest Green: A modern twist, especially striking on brown eyes.
Understanding the anatomy of the smoky eye also means recognizing the different areas of the eyelid and how each contributes to the final look. The lid, crease, outer V, and brow bone all play a role in creating that multi-dimensional effect, and proper placement of color in each area is paramount for achieving a professional finish. This foundational knowledge will serve as your blueprint for every smoky eye application.
Essential Tools and Products for a Flawless Finish
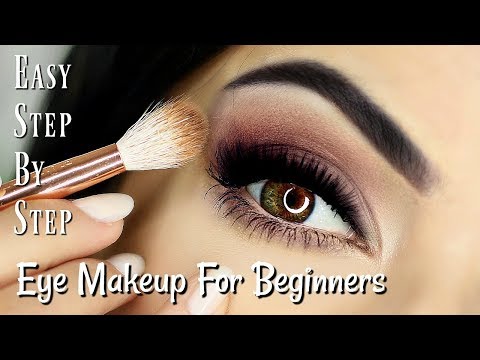
Achieving a truly professional smoky eye isn’t just about technique; it also heavily relies on having the right arsenal of tools and products. Just as an artist needs quality brushes and paints, a makeup enthusiast requires specific items to create a seamless, long-lasting smoky effect. Investing in good quality products will make a significant difference in both the application process and the final result.
From primers that ensure longevity to brushes that allow for precise blending, each item plays a crucial role. Skipping any of these essential steps or tools can lead to a less polished or less durable smoky eye. Let’s delve into the must-haves for your makeup bag.
The journey to a captivating smoky eye begins with a meticulously built base. This initial phase sets the stage for the depth, intensity, and blendability that are hallmarks of this classic look. Rushing through these foundational steps can compromise the entire outcome, leading to a patchy or less impactful finish. Patience and precision here will pay dividends.
Starting with a clean, primed eyelid is non-negotiable. The primer not only helps the shadows adhere better but also acts as a barrier, preventing natural oils from breaking down the makeup. This ensures your smoky eye remains vibrant and crease-free for longer. After priming, selecting the right base color is your next critical decision.
Building the base correctly ensures that the subsequent layers of eyeshadow will blend seamlessly and hold their intensity. The smudged eyeliner is particularly important as it provides the deepest pigment closest to the lash line, which is characteristic of the smoky eye. This initial depth is what gives the look its dramatic flair and sets the tone for the entire application process.
Mastering the Blend: Creating Depth and Dimension
The true artistry of a smoky eye lies in the blending. This is where harsh lines disappear, and colors seamlessly transition, creating that coveted ethereal, smoky effect. Without proper blending, your eye makeup can look heavy and unrefined, rather than sophisticated and alluring. It’s a step that requires patience and the right tools.
A truly complete smoky eye extends beyond the upper lid, incorporating the lower lash line and strategic highlights to balance the drama. These finishing touches are what elevate the look from merely good to absolutely stunning, ensuring a cohesive and polished appearance. Neglecting these steps can leave the eye looking unfinished or top-heavy.
Even with a detailed guide, creating the perfect smoky eye can present a few challenges, especially for beginners. From uneven blending to fallout, these common issues can be frustrating. However, understanding how to troubleshoot these problems can save your look and boost your confidence. Every makeup artist has faced these hurdles, and knowing the solutions is part of mastering the craft.
While the classic black and gray smoky eye remains eternally chic, the beauty of this technique lies in its adaptability. Once you’ve mastered the fundamentals, you can begin to explore a myriad of variations and modern twists that can tailor the smoky eye to any occasion, personal style, or current trend. This versatility ensures that the smoky eye never feels outdated or repetitive.
| Key Step | Brief Description |
|---|---|
| Primer Application | Ensures long-lasting wear and vibrant color payoff for eyeshadows. |
| Eyeliner Base | Creates initial depth at the lash line, smudged for a soft, dark base. |
| Seamless Blending | Critical for diffusing harsh lines between shades, creating the smoky effect. |
| Finishing Touches | Includes lower lash line, inner corner highlight, and mascara for completeness. |
Frequently Asked Questions About Smoky Eyes
What are the essential brushes for a smoky eye?▼For a smoky eye, you’ll need a flat shader brush for packing on color, a fluffy blending brush for diffusing shades in the crease, and a small pencil brush for precise application on the lower lash line and outer V. A clean blending brush is also crucial for seamless transitions.
Can I achieve a smoky eye with just one eyeshadow?▼While challenging, it’s possible to create a minimalist smoky eye with one dark eyeshadow. Apply it densely at the lash line and blend upwards with a clean brush to diffuse the edges. However, using at least two shades (dark and a transition) yields a much more dimensional and classic smoky effect.
How do I prevent my smoky eye from looking messy or raccoon-like?▼To avoid a messy look, focus on precise product placement and meticulous blending, especially on the lower lash line. Don’t extend dark shadows too far down or out. Use a light hand, build color gradually, and clean up any fallout with powder or concealer. A good primer helps prevent smudging.
What’s the best way to apply eyeliner for a smoky eye?▼For a smoky eye, start with a soft kohl or gel eyeliner pencil along the upper lash line. Draw a thicker line than usual, then immediately smudge it upwards and outwards with a dense brush. This creates a soft, diffused base that seamlessly blends with your eyeshadows, adding depth without harshness.
Can a smoky eye be worn during the day?▼Absolutely! For a daytime smoky eye, opt for softer shades like browns, taupes, or muted grays instead of black. Keep the intensity concentrated at the lash line and blend minimally. Skip heavy lower lash line application and choose a less dramatic mascara to maintain an elegant, understated look suitable for daily wear.
Conclusion
Mastering the smoky eye tutorial is a skill that, once acquired, will undoubtedly become a cornerstone of your makeup repertoire. From understanding the essential tools and products to meticulously building the base, achieving seamless blends, and adding those crucial finishing touches, each step contributes to the overall allure of this timeless look. While challenges may arise, persistent practice and a willingness to experiment with variations will empower you to create a smoky eye that not only enhances your features but also expresses your unique style. Embrace the journey of perfecting this iconic makeup technique, and prepare to captivate with every glance.